| Siege of Tempest Refuge | |
|---|---|
| |
| Faction | |
| Type | Adventure |
| Minimum Level | 30 |
| Veteran Level | 50 |
| Location | Whitevale |
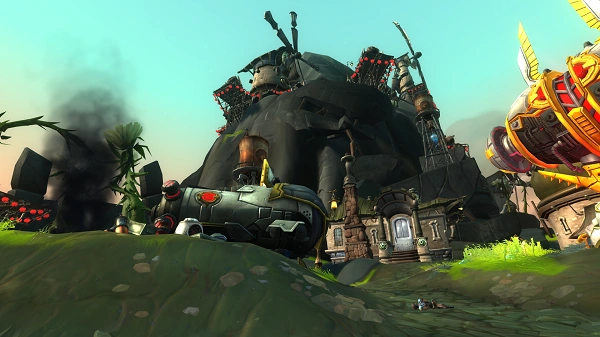
The Siege of Tempest Refuge is a 5-man Adventure style instance in WildStar, available at level 30, and located in Whitevale, in the region of Alizar, and is the first 5-man instance in contested territory.
Upon reaching level 30, players will receive a call on their datachron asking them to visit the SimCore. After a quick quest to light several torches, the adventure will be unlocked.
Plot[]
Players take on the roles of the defenders of Tempest Refuge, an Exile town in Galeras against a prolonged enemy siege. For Dominion players, it is explained that they have recently conquered the town and the Exiles are attempting to take it back.
The group must command the NPC soldiers to optimize the defence, as well as deal with a wide variety of enemy troopers attempting to storm the town. Failing that, the players will be given the chance to fall back to Skywatch and make their last stand there.
Strategy[]
Unlike some adventures, there is no Choose Your Own Adventure portion of this instance. Instead, players must react to what the attackers are doing.
This adventure is intense and the different mechanics will keep players on their toes. It has 5 bosses that will each appear once the group has cleared 4 waves of soldiers. Each wave of attackers is usually different and the more you get close to the last boss the harder it will get.
Players will find at least one snare, stun, and movement ability useful for this instance. Throughout the battle, the Morale bar in the upper left will drop. This simulates the fatigue of constant fighting by increasing the cooldown time on Dashing and Sprinting.
Positioning[]
Your base has 3 entrances: North, Middle, and South. Note that the eastern exit that leads to Skywatch will not be used by the enemy.
This positioning is not final, during the adventure you will have to go to the other entrances in order to assist your party members. For example assist the DPS at the South entrance who's getting overwhelmed. When not fighting bosses, much of this instance is a DPS race. Tanks and Healers should be prepared to provide offence as needed.
- North: 1-2 DPS will be needed here as well as at least one NPC soldier.
- South: 1-2 DPS will be needed to cover this along with at least one NPC soldier.
- Middle: The tank is required here along with at least one NPC soldier. Ideally the tank should be able to hold off any foot soldiers by himself while the group clears out the North and South entrances. Then they can move to help the tank. Optionally, the DPS at North and South can drag their mobs to Mid so they can all be defeated together.
Trash[]
The enemy will send 4 waves of trash mobs before each boss. Here is an overview of the different trash, their skills and the priority you should give them:
Please keep in mind that you can Interrupt all the trash mobs.
- Exile/Dominion Rocket Trooper: Standard soldier with a rocket launcher.
- Mortar Barrage: Just like any other Mortar Barrage, if you're targeted by it just run until the cast is over. But do not run near one of your group members. This does insane damage and you should not take any damage from it if you kite correctly.
- Shell Storm: Frontal telegraph. Just avoid it.
- Exile/Dominion Specialist: A typical stalker.
- Flashbang: He'll do a little telegraph around him, you'll get blinded if you get hit by it. Just interrupt or dash out of it.
- The Bunker Buster: This is protected by 2 Exile Bomb Guardians. They're just warriors and should be quickly taken out so you can concentrate on the bunker.
- The Bunker Buster moves slowly, but should be snared so that its movement is almost completely negated. Needless to say, if the Bunker Buster reaches your generator, you're going to have a bad time. Players should drop whatever they're doing to assist in destroying this.
- Currently, if a Stalker walks through the Bunker Buster while stealthed, it will stop entirely and no longer move. This gives players all the time they need to destroy it. This may be a bug.
- Exile/Dominion Rifleman: Standard trooper.
- Mortar Barrage: This is identical to the Rocket Trooper's mortar.
- Exile/Dominion Assault Tank: This is the second most dangerous trash in this adventure. It will usually spawn alone. Everyone should get to it's location and burn it down ASAP. Players will also need to snare the tank.
- Exhaust Blast: The tank will do a huge telegraph around him. Getting hit by it will knock you back and deal damage but won't interrupt you. Needless to say melee will have a hard time burning this down. The tank doesn't have any Interrupt Armor and even though the cast for Exhaust Blast is quick it should be interrupted.
- Exile/Dominion Shocktrooper: These are typical warriors.
- Hack and Slash: A frontal combo that can be avoided easily.
- Double Strike: A wide frontal telegraph that should be interrupted.
- Exile/Dominion Sniper: These spawn inside your base.
- Once a player gets close to them, they will Snipe them. This will knock the player down and deal some damage. Just Dash to interrupt a sniper's aim.
- Shell Storm: A frontal telegraph. Just avoid it.
- Once a player gets close to them, they will Snipe them. This will knock the player down and deal some damage. Just Dash to interrupt a sniper's aim.
- Exile/Dominion Saboteur: THESE GUYS ARE YOUR TOP PRIORITY. You will see a message "Saboteurs are inside the perimeter! Your Turrets are temporarily disabled!" These are stealth units when you see this message 2 DPS or 1 DPS and the Tank need to RUSH AS FAST AS POSSIBLE to the generator and start shooting near the generator to make those Saboteurs appear.
- Saboteur's Explosive Charge: This is a bomb that will generally be set up near your generator. The radius of detonation usually is big enough to reach it. If the charge goes off, it's game over for the gold medal as this does massive amounts of damage. If you see one of those, you need to defuse it. The detonation takes quite a while to be triggered so don't panic.
- Shadow Darts: A frontal telegraph that deals very little damage.
Random Environmental Events[]
During the waves of trash, players will also have to deal with random events:
- Artillery Barrage: Your NPC Commanding Officer will warn you that airstrikes are incoming. Following that, there will be random artillery strikes inside your base. They last for 30 seconds, and huge telegraphs will appear that must be avoided. The cast time is pretty long so taking damage from them should not happen. The barrage only targets your base but won't cause any damage to the Generator so don't freak out. Another way to avoid it is to stay outside your base during the strike, since the telegraphs will not appear there.
- Mines: Mines will appear inside your base, stepping on them or near them will make them detonate. The detonation will create a telegraph around the mine, you just need to dash out of it before the detonation cast is finished. Getting hit by the Detonation will knock you back and deal some damage. The generator won't take damage from a mines Detonation.
Bosses[]
All bosses should be tanked near the entrance of your base in order to get some hits from your turrets and even your soldiers, depending on how you placed them. Be warned: this Adventure is stingy on letting you get too far from your base. Attacking a boss at a location that seems reasonable can result in players being constantly teleported closer to the base due to being outside the Adventure's boundaries.
 Dynamite Dax or
  Chief Engineer Vortec: He is a kind of Engineer that will make 2 bots appear. Either summon cast can be interrupted.
- Uplink Hack: This will make "Hack" appear. This bot will hack your turrets and turn them against you. Just avoid the frontal telegraph from the turrets.
- Uplink Sparks: This summons a bruiser bot, which sometimes does a static whirlwind. Just avoid it.
- Exile Warbot or Dominion Warbot: This giant robot looks threatening but isn't actually a big threat beyond some simple telegraphs. Its casts are slow, so feel free to interrupt its casts to gain as many MoOs as possible.
- Missile Swarm: Three telegraphs will appear in front of him that represent the targets of the missile strike. Just avoid it.
- Repulse Field: This will create a field around him. This will knock you back out of the field and deal you damage. Avoid it.
- Exterminate: Just like Exterminate in Kel Voreth, except this time the laser beam will follow you. This has a freakishly LONG cast time and should be interrupted. Remember not to kite the beam near your group members unless you hate them.
- Bomb Threat: Three telegraphs appear in front of him.
- FCON Commandos or Jaeger Guard: These four enemy heroes are really easy to defeat if you know who to kill first.
- Elementalist Frostleaf or Elementalist Vermilius: The first one to burn down ASAP because of her skill:
- Ice Storm: This will make a telegraph appear at a targeted zone, staying in this telegraph will deal insane damage. The cast lasts for as long as the telegraph stays on the ground so she should be interrupted. Your healer will need to prepare himself for big slaps on the tank, since the Ice Storm usually appears on the Elementalist's focus, which should always be the tank.
- Stay Frosty: This is an AOE around her that must be avoided. If you get hit by it you'll get a snare debuff.
- Medic Springwell or Bloodshaman Vakaza:
- HP Stations: Once these guys get under 30% hp the Medic or Bloodshaman will make HP stations appear on the ground. Players must run and collect them before the enemy bosses do.
- Trooper Bashok or Bruiser Shuni: This is your typical warrior that doesn't anything except big damage.
- Reaper Ludov or Saboteur Arminex: Nothing special beyond basic melee skills.
- FCON Defense Tank or Dominion Assault Tank: This is one of the easier bosses, but it can kill you quickly if you're not paying attention.
- Missile Swarm: Just like a Mortar Barrage, this will put a telegraph on you that will follow you as long as he casts it. Just run/kite.
- Exile/Dominion Assault Probe: The boss will summon several spider tank-like probes. The probes will focus someone and run after them. Once they reach their target, they'll detonate. Just avoid the detonation radius.
- Pulse Burst: A knock back and down that deals medium damage. Since the cast time is pretty long this should be interrupted.
- Shock Field: This is a sweeping telegraph in front of him. Just move away from it. This does insane damage and absolutely must be avoided.
- Esper Alderblade or Esper Moko: Of all the bosses, she is the most painful to fight.
- Clones: She will cause doubles of herself to appear that cast Unstable Vision.
- Unstable Vision: This creates a little AOE around her which is easy to avoid. This skill is only done by her images and once they're done casting it they will disappear.
- Shadow Darts: This is a frontal cone that does little damage.
- Shadow Quake: This is the most unforgiving mechanic of this adventure. She will make a telegraph appear at the feat of one of the players. If you get hit by it you'll get disoriented. This telegraph will tick multiple times and will follow you. You need to kite it. If you get hit once, it's almost sure you'll get hit again since you'll be disoriented. Each tick will disorient you again. Basically If you get hit once you'll get a constant disorient. To make things even worse, this does crazy damage, and will kill you if you're not careful.
Throughout the fight she will cast more and more doubles of herself. Just tank them, avoiding Unstable Vision and Shadow Quake. If you manage to do all this you're golden.
- Sharpshooter Spark or Marksman Decimus:
- Agent Blackwatch or Agent Razios: This Spellslinger likes to move around a lot.
- Shadow Step: He'll pick a random target, teleport to them, and drop agro. The tank should taunt back, but he does this enough that the tank may be unable to keep up.
- Shadow Mine: This places a tether mine around all players. The cast can be interrupted, but if he gets it off then the mines will have to be DPS'd down. Failing that, make sure you're only hit by your own.
- Evoker Peale or Siren Aria: One of the tougher bosses in Siege, there's two big abilities you'll need to look out for. The tank should always face Peale or Aria away from the raid.
- Barrage: The boss will fire a medium ranged cone attack towards whoever has agro. The tank must dash out of this ASAP, as it is a channeled ability that stuns and knocks back. If you get hit once, you're likely to get hit multiple times, which can very quickly kill you. The timing on this is unforgiving.
- Sonic Tunnelers: Throughout the fight, droids will be summoned at the boss's location that slowly move outwards in a random direction. Anything in their path is knocked back and takes damage. Like the above ability, getting hit by this once means you're likely to get hit by it again, and so it can quickly kill someone unaware. Even trickier, the telegraph on the Sonic Tunnelers is inconsistent. Watch for the droids and the clouds they emit to know where to dodge. Melee will need to be at their maximum range so they can avoid these.
- Sergeant Berog or Corporal Vizrek: This Warrior only really has one move to worry about, but it can kill if the party isn't paying attention.
- Knockback & Stun: He'll target a party member at random, stun them, and start dealing massive damage. All other party members will be knocked back and need to use a movement ability to quickly get back to him. The ability will likely kill the target unless interrupted in time. Everyone stacking on the tank, as well as positioning near a wall can help against this ability.
Aftermath[]
After the fifth boss is killed, a swarm of soldiers will spawn. Don't freak out as they do little to no damage. Just retreat to your generator and DPS/Tank any that break through your NPC soldiers until the "Special Delivery" from Munitioneer Ranix (if Dominion) arrives. Yeah you guessed it: it's a BIG BANG AOE that will send all those invaders to hell.
Skywatch[]
Should the players fail to defend the Generator at Tempest Refuge, the NPC Commander will call for a retreat to Skywatch for a second chance at victory. If this happens, players must run a gauntlet of mines to Skywatch, where the same basis principles listed above still apply. Defending Skywatch is no easier than defending Tempest Refuge, however, other than that there are only two entrances (east and west) to worry about.
Medal requirements[]
- Bronze : Second generator survives.
- Silver : First generator must survive.
- Gold : First generator has 95% or higher health.